MSP360 CloudBerry Backup Desktop Application
MSP360 supports all major platforms, including Windows, Linux, Mac, Hyper-V, and VMware. Existing MSP360 users can access their IDrive® e2 storage through the MSP360 Backup application. Choose cloud object storage compatible authentication for connecting to IDrive® e2. Ensure that the following prerequisites are met.
Prerequisites:
You must have an IDrive® e2 account with at least one storage bucket.
To access IDrive® e2 using Access Keys,
- Download and install the MSP360 Backup software on your computer.
- Launch the MSP360 application.
- Add a new storage account from the Backup Storage tab.
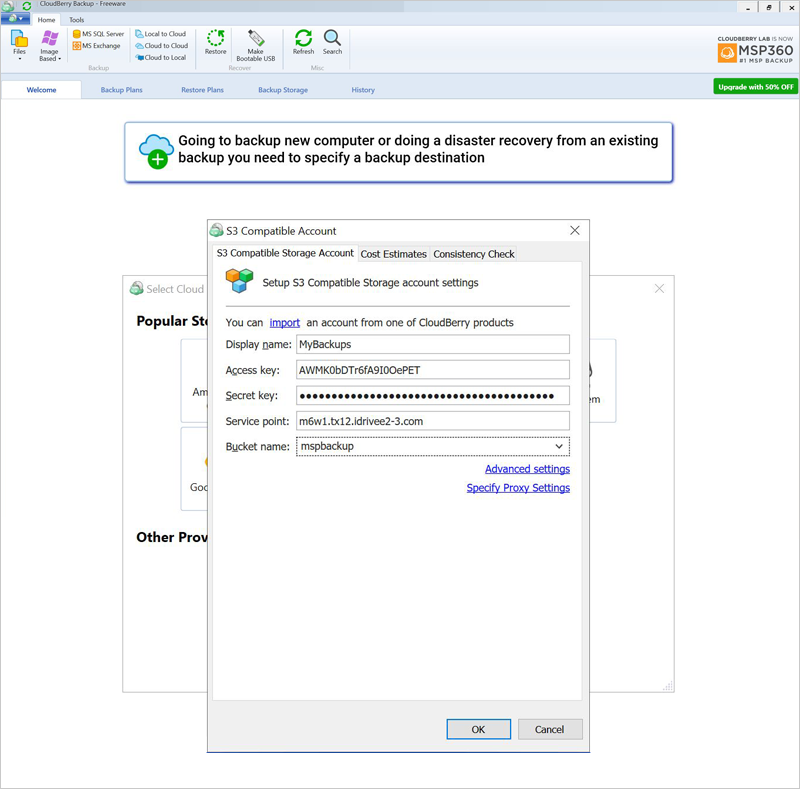
- Click S3 Compatible. The S3 Compatible Account pop up appears.
- Enter the Display name, Access key and Secret key and endpoint. Access keys can be obtained from the Access Keys tab of the IDrive® e2 account.
- Specify the S3 Bucket name where you want to store your backups.
- Select any signature version from the options.
-
Click OK.
- Once a storage account is added, create a backup plan – Local to Cloud, Cloud to Cloud, Cloud to Local options are available.
To store the files on your computer in IDrive® e2,
- Select Local to Cloud from the MSP360 application menu. The Create backup Plan Wizard will appear.
- Select the type of backup you wish to perform.
- Select the Backup Storage account from the list. You can also add a new storage account.
- Enter a plan name.
- Select the preferred backup mode.
- Set advanced preferences if required.
- Choose the files to backup.
- Create a schedule for your backup.
- Review the backup plan and click Next to create the plan.
- Click Start icon corresponding to the newly created backup plan to start the backup immediately or the backup will start at the scheduled time.
MSP360 Service Provider Console
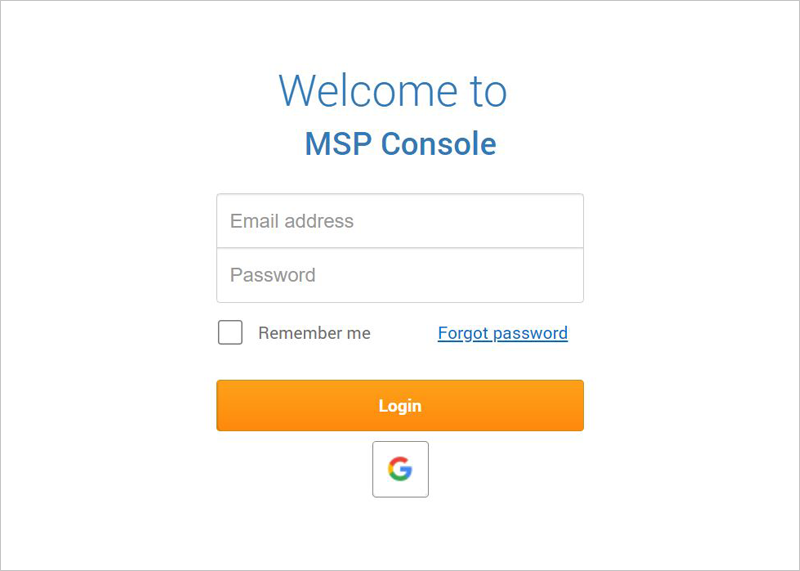
- Login to your MSP Console.
- To add IDrive® e2 as Storage account; click Storage > Storage Accounts.
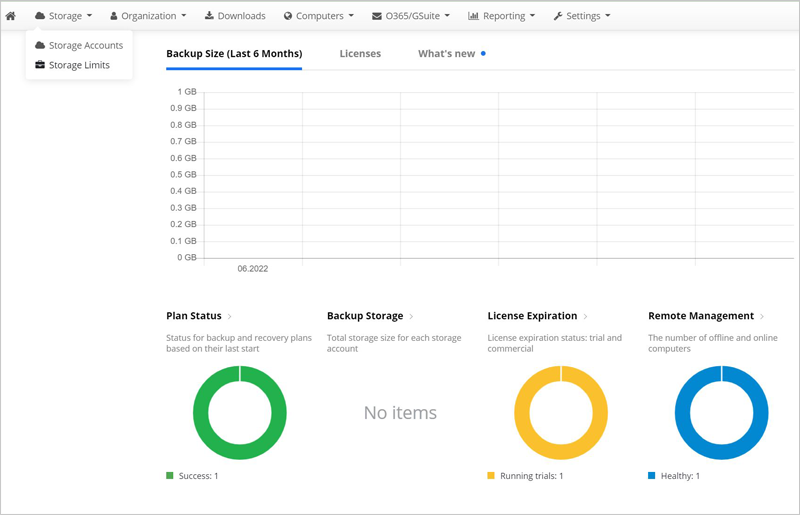
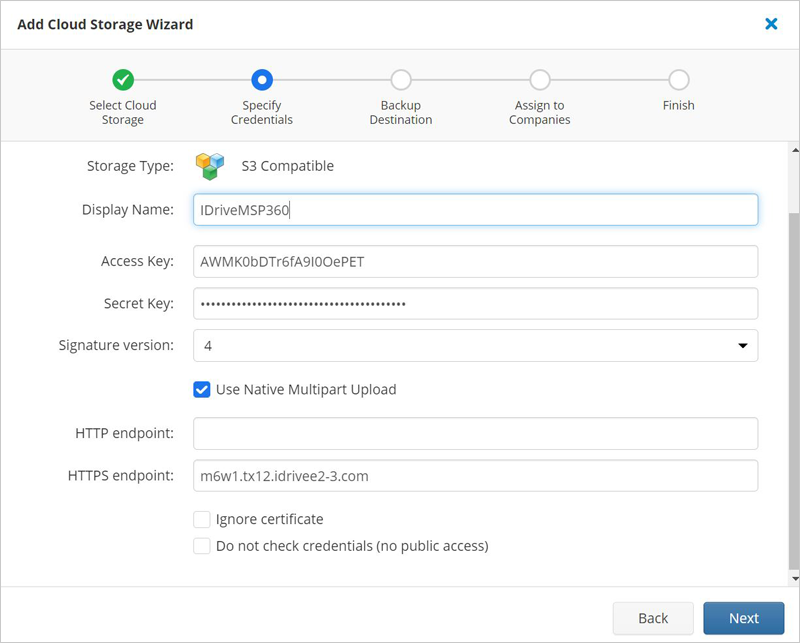
- Click Add Account and select S3 Compatible.
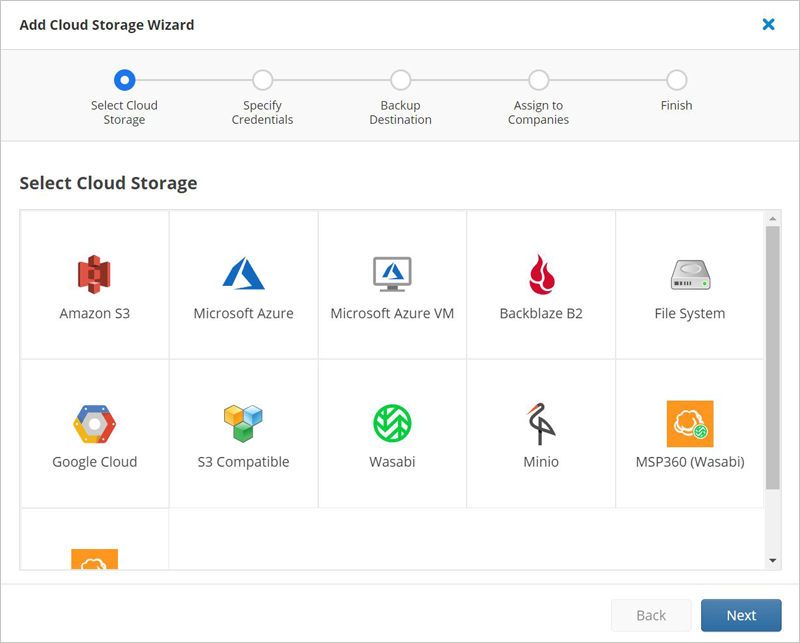
- Enter the Display Name, Access Key, Secret Key and HTTPS endpoint. Access keys can be obtained from the Access Keys tab of the IDrive® e2 account.
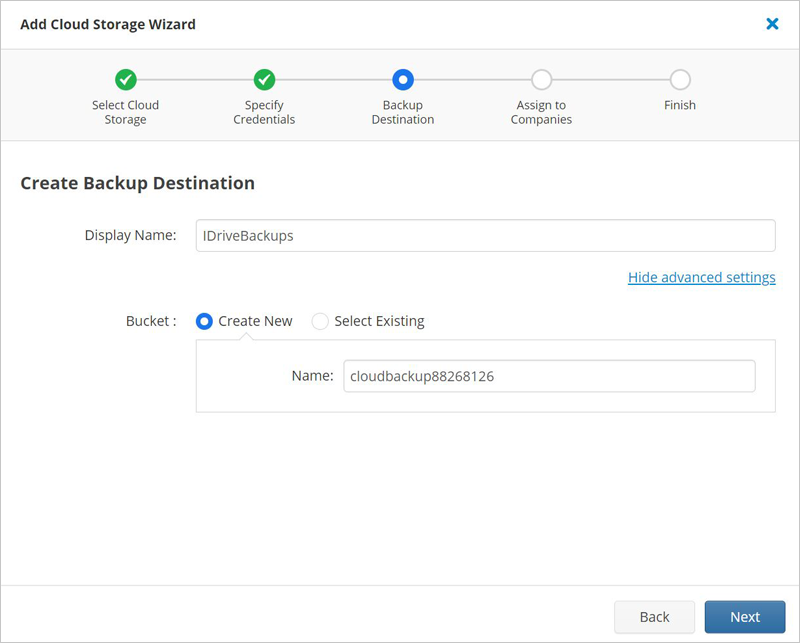
- Click Next and enter the Display Name, select the bucket and click Next.
Note: If you have entered bucket specific access keys then choose Select Existing, else you can select the option to Create New.
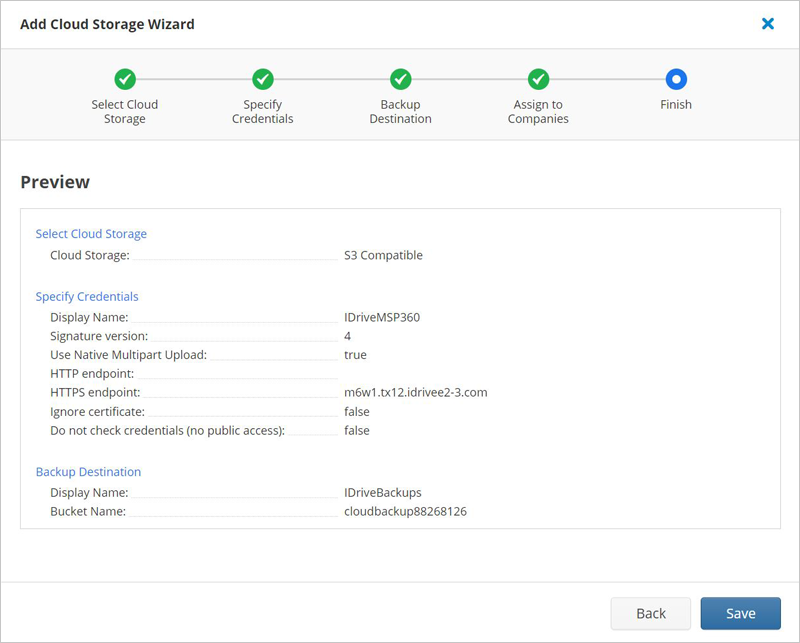
- Assign to the company that you wish and click Next and Save.
Now you can choose this storage account as a backup destination for your MSP360 Backups.
Note: Data restoration is handled by your specific backup solution provider and is affected by multiple variables that are unique to your environment. For application-related enquiries/support, it is strongly recommended you seek guidance from the technical team of your backup solution provider.